
Preparing a Waterloo home for fitted-cabinet installation requires clearing the workspace, protecting floors and fixtures, verifying wall conditions, and ensuring proper electrical and plumbing access before the installation crew arrives. Proper preparation typically takes one to two days and directly impacts installation efficiency, reducing labor costs and preventing project delays.
Construction managers who invest time in thorough pre-installation preparation create safer work environments and help cabinet installers complete their work on schedule. The process involves more than simply clearing furniture. Walls must be inspected for levelness and structural integrity, existing cabinetry or fixtures need removal, and all utilities affecting cabinet placement require verification and, when necessary, relocation.
Waterloo’s mix of older heritage homes and modern construction presents unique challenges. Older properties often feature plaster walls, outdated wiring, and non-standard dimensions that require additional attention before installation day. Modern builds typically offer more predictable conditions but still demand systematic preparation to avoid mid-project surprises.
The preparation phase also provides an opportunity to coordinate with trades, confirm measurements against installation plans, and address any discrepancies before cabinets arrive on site. This proactive approach prevents costly reinstallation work and maintains client satisfaction throughout the project timeline. Professional preparation demonstrates the quality standards that separate experienced construction teams from those who learn expensive lessons during installation.
Essential Considerations Before Cabinet Installation Begins
Before you begin dismantling existing cabinets or ordering materials, assess three fundamental aspects that will determine your preparation timeline and approach. First, carefully evaluate the existing kitchen layout and measure the installation area with precision, even a quarter-inch discrepancy can cause significant installation delays. Second, map all utility locations including electrical outlets, plumbing supply lines, drain stacks, and gas connections; many Waterloo homes built between the 1950s and 1980s have utility placements that don’t align with modern cabinet standards, requiring relocation work.
Key Takeaway: Successful preparation hinges on three critical factors: obtaining accurate room measurements (including ceiling height and floor levelness), documenting exact utility line locations, and assessing structural integrity of walls and floors before demolition begins.
Understanding Waterloo’s housing stock helps anticipate challenges. Post-war bungalows and split-levels often feature plaster-and-lath walls that require gentler demolition techniques than drywall, while homes from the 1990s forward typically present fewer structural surprises but may have builder-grade materials needing reinforcement for heavy cabinetry. Specialists like Canadian Custom Cabinets understand these local housing characteristics and can advise on structural requirements. Check wall studs for spacing, older homes may have irregular spacing rather than the standard 16-inch centres.
Timeline planning must account for the age and condition of existing infrastructure. Budget at least two to three days for a straightforward preparation in a standard 10×12 kitchen, but add 50% more time if utility modifications are needed. Homes requiring asbestos testing or lead paint remediation will extend this further. Coordinate your preparation schedule with your installer’s timeline to avoid gaps that leave the kitchen unusable for extended periods.
Tools, Materials, and Equipment You’ll Need
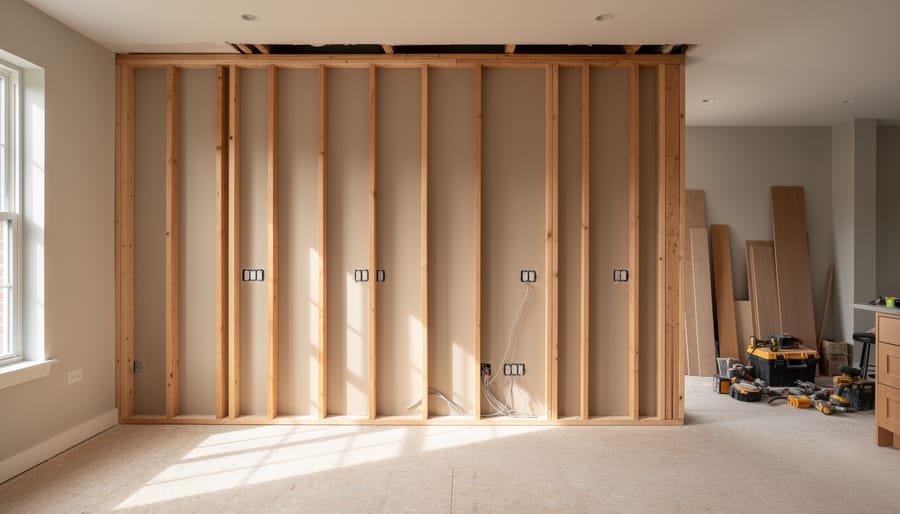
Successful cabinet preparation requires the right tools and materials at hand before you begin. Having everything organized by task category streamlines your workflow and prevents mid-project delays.
Measurement and Layout Tools
Start with the essentials for accurate planning. You’ll need a laser level or 4-foot spirit level, measuring tape (25-foot minimum), combination square, and chalk line for marking reference points. A stud finder helps locate framing members, while a straightedge (6 to 8 feet) confirms wall flatness.
Demolition and Removal Equipment
Cabinet removal demands pry bars of varying sizes, a reciprocating saw for cutting through fasteners, utility knives, and adjustable wrenches for disconnecting plumbing. Keep a hammer, screwdrivers (both Robertson and Phillips head), and a small crowbar on hand. For larger jobs, you may want to rent renovation equipment such as dumpster bins or power tools rather than purchasing items you’ll use once.
Surface Preparation and Repair Materials
Your supply list should cover wall and floor fixes:
- Joint compound and drywall patches for wall repairs
- Primer suitable for kitchen environments (moisture-resistant formula)
- Wood filler for minor carpentry repairs
- TSP cleaner or equivalent degreaser for surface preparation
- Sandpaper in various grits (80, 120, 220)
- Drop cloths and painter’s tape for protecting adjacent areas
Safety Equipment
Never compromise on protection. Stock dust masks or respirators rated for drywall dust, safety glasses, work gloves, and hearing protection if using power tools. Knee pads prevent fatigue during floor-level work.
Optional Rental Equipment
Large-scale preparation jobs benefit from rented tools: scaffolding or work platforms for high ceilings, reciprocating saws, shop vacuums with HEPA filters, or specialized demolition equipment. Rental services provide access to professional-grade tools without the capital investment, particularly valuable for one-time preparation projects.
Safety Requirements and Precautions
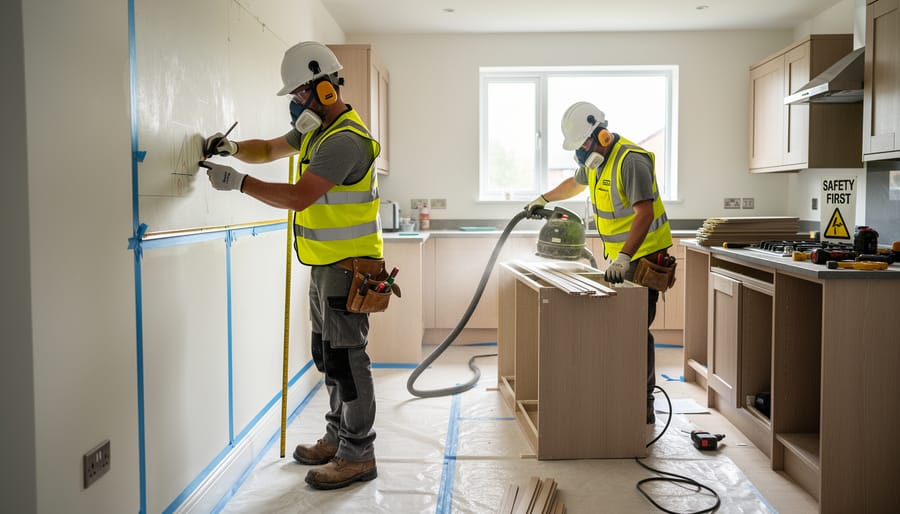
Safety protocols during cabinet preparation work protect both your crew and the homeowner’s property. Before beginning any demolition or modification work, conduct a thorough hazard assessment of the workspace to identify potential risks specific to the home’s age and construction.
Personal protective equipment forms your first line of defense. At minimum, require hard hats in areas with overhead work, safety glasses for demolition tasks, work gloves rated for the specific task, and steel-toed boots. When removing old cabinets or working in confined spaces, dust masks rated N95 or higher prevent inhalation of particulates. For homes built before 1990, assume the presence of asbestos in insulation, flooring adhesives, or joint compound until testing proves otherwise. Lead paint commonly appears in Waterloo homes constructed before 1978, particularly on older cabinet surfaces and trim work. Never sand, grind, or create dust from suspected lead or asbestos materials without proper containment, PPE, and disposal procedures. When uncertain, halt work and arrange professional testing through certified labs.
Electrical safety requires confirming that circuits are de-energized with a voltage tester before touching any wiring, not simply relying on breaker switches. Tag out panels to prevent accidental re-energization while work progresses. For plumbing modifications, shut off water supply lines and verify pressure release before disconnecting fixtures. Keep a fire extinguisher accessible when working near gas lines or using power tools.
Manual handling of old cabinets presents significant injury risk. Apply proper back safety tips when lifting, use mechanical assistance for units exceeding safe lifting weights, and never work alone when removing wall-mounted upper cabinets that could fall unexpectedly. Access current hazardous materials info to stay updated on identification and handling protocols. Maintain clear egress routes throughout the work area and ensure adequate ventilation, especially when using adhesives, primers, or sealants in enclosed spaces.
Step-by-Step Preparation Process
Step 1: Conduct Initial Site Assessment and Measurements
Start by clearing the installation area completely, remove appliances, furniture, and any items that might obstruct access to walls, floors, and ceilings. This gives you an unobstructed view of the space and reveals potential issues before they become problems.
Use a laser level or 4-foot spirit level to check wall plumbness at multiple points along each wall where cabinets will hang. Mark any deviations greater than 1/4 inch over 8 feet, as these require correction before installation. For floors, place a 6-foot straightedge in several directions across the installation area, checking for dips, humps, or slopes with feeler gauges. Floors out of level by more than 3/16 inch over 10 feet need addressing.
Document everything with photos and detailed measurements. Record ceiling height at multiple points, measure from corners to existing plumbing and electrical outlets, and note the location of every stud using a stud finder. Mark these directly on the wall with painter’s tape.
Check behind existing baseboards for gaps, water damage, or pest activity. Inspect corners for squareness using a framing square, out-of-square corners affect cabinet fit and may require filler panels or scribing during installation.
Step 2: Remove Existing Cabinets and Fixtures
Begin by shutting off power at the circuit breaker and water supply valves before touching any fixtures. Remove cabinet doors and hardware first, this lightens the load and prevents damage during removal. Work from top to bottom, starting with upper cabinets to avoid having them fall on base units.
For base cabinets, disconnect plumbing carefully. Place buckets under P-traps and supply lines to catch residual water. If you’re unfamiliar with plumbing disconnections or encounter corroded fittings, call a licensed plumber rather than risk leaks or broken pipes. Loosen electrical connections at junction boxes, never by pulling wires.
Once utilities are disconnected, locate and remove mounting screws, typically found inside cabinets along the back rail and through cabinet sides into studs. Have a helper support each cabinet section as you remove the final screws. Older cabinets may also be glued or caulked to walls, requiring gentle prying with a flat bar.
Protect floors with heavy cardboard or plywood sheets during removal. When prying cabinets away from walls, place thin wood shims behind your pry bar to distribute pressure and minimize drywall damage.
For disposal, many Waterloo-area waste services accept cabinet materials, or consider donating salvageable units to Habitat for Humanity ReStore. Separate materials by type for efficient disposal or recycling.
Step 3: Address Wall and Floor Repairs
After removing existing cabinets, you’ll often uncover damage that needs attention before new installations. Start by inspecting walls for holes from old mounting hardware, drywall damage, or areas where finish has pulled away. Fill screw holes and small depressions with joint compound, feathering edges for a smooth finish. Larger damaged sections may require cutting out compromised drywall and patching with new material, taping seams properly.
Check walls for plumb using a four-foot level at multiple points. Out-of-plumb walls can cause cabinet alignment issues, so consider furring strips or strategic shimming locations where deviations exceed 1/4 inch over eight feet.
Examine floors carefully for levelness, particularly in older Waterloo homes where settling occurs. Use a long straightedge or laser level to identify dips or humps. Variations beyond 1/8 inch over ten feet typically need correction through self-leveling compound or plywood shimming under base cabinets.
Address any water damage immediately. Soft spots around old sink bases or discoloured areas indicate rot requiring complete removal and replacement with sound material. This prevents future structural problems and ensures secure cabinet mounting.
Prime all repaired surfaces once dry to seal them and provide consistent adhesion for cabinet installation.
Step 4: Relocate or Modify Utilities
Relocating utilities represents one of the most critical preparation tasks, and it’s where professional licensing requirements become non-negotiable. In Ontario, electrical work must be performed by licensed electricians, and plumbing modifications require licensed plumbers. Gas connections always demand certified gas fitters.
Start by comparing your cabinet layout to existing utility locations. Outlets typically need repositioning to align with appliance placements and avoid being hidden behind cabinet boxes. Most modern kitchens require outlets every four feet along countertops, positioned 4-6 inches above the backsplash line. Mark new locations on your layout before calling trades.
For plumbing, determine whether supply lines and drains align with sink locations in the new cabinet plan. Older Waterloo homes often have cast-iron drain stacks that limit relocation options. Your plumber can assess whether supply lines need rerouting or simply extending.
Coordinate all utility work before cabinet delivery. Licensed trades need clear access and time to complete installations, obtain inspections, and patch walls. Schedule electrical rough-in first, followed by plumbing, then arrange municipal inspections. This sequence prevents delays and ensures installers arrive to a fully compliant, ready workspace.
Step 5: Prepare and Prime Installation Surfaces
Thoroughly cleaning and priming installation surfaces creates the stable foundation cabinets need for secure, long-lasting mounting. Start by removing all dust, debris, and construction residue from wall repairs using a shop vacuum followed by tack cloths. Pay particular attention to areas around outlet boxes and along the floor line where dust accumulates.
Inspect walls for any grease, soap residue, or old adhesive that could compromise primer adhesion. Clean these areas with a degreasing solution like TSP (trisodium phosphate) and rinse thoroughly before allowing to dry completely. For Waterloo homes with plaster walls, check for any powdery or chalky surfaces that indicate deteriorating substrate requiring stabilizing primer.
Apply a high-quality primer to all repaired drywall patches and bare wood surfaces. In areas behind sinks or near dishwashers, use moisture-resistant primer to prevent future water damage. Don’t skip priming even small patches, as unprimed areas can telegraph through cabinet backs or create uneven adhesion points.
For basement or below-grade kitchen installations common in Waterloo split-levels, seal concrete or block walls with masonry sealer before cabinet mounting. Allow all primers and sealers to cure according to manufacturer specifications, typically 24 hours minimum, before installation begins.
Step 6: Mark Cabinet Layout and Reference Lines
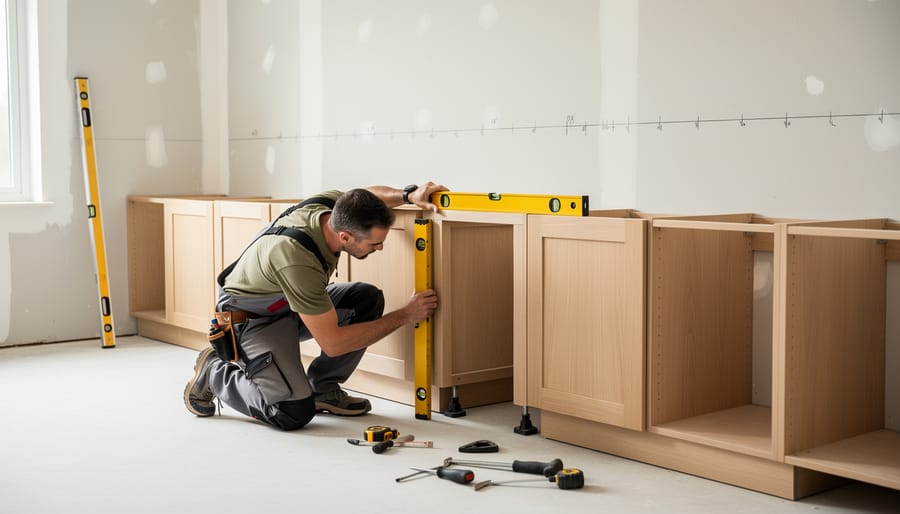
Creating precise layout marks transforms your preparation work into actionable guidance for installers. Start by establishing a level reference line across the entire installation area, typically 34½ inches from the finished floor for base cabinets, which accounts for standard 36-inch counter height minus the countertop thickness. Use a laser level or 4-foot spirit level with a straightedge to ensure accuracy across long runs.
Mark vertical plumb lines at key locations: cabinet edges, corners, and where upper cabinets meet lower units. Locate and mark all wall studs within the installation zone using a stud finder, then confirm by driving a finish nail through the drywall. Mark studs clearly with painter’s tape extending above where upper cabinets will hang, installers need these locations for secure mounting.
On the floor, outline the footprint of base cabinets using chalk lines or low-tack tape. Mark locations where plumbing and electrical outlets will emerge through cabinet backs or bottoms. Include centerline marks for sinks and appliances to confirm alignment with rough-in work. Label everything clearly: “stud,” “electrical,” “water supply,” “drain”, eliminating guesswork saves installation time and prevents costly mistakes during the final phase.
Step 7: Perform Final Pre-Installation Check
Walk through the entire workspace methodically, verifying each preparation element against your project plan. Confirm all measurements match the cabinet specifications, check that utility connections are accessible at marked locations, and test electrical outlets for proper function. Remove all tools, debris, and construction materials from the installation area. Inspect walls and floors for levelness one final time, ensuring no preparation step was overlooked. Document the completed workspace with photos showing clear access points, clean surfaces, and properly marked layout lines, providing this verification to the installation team before their arrival.
Verifying Readiness and Quality Control Checklist
A thorough pre-installation inspection protects both your timeline and your reputation. Before cabinet installers arrive, systematically verify every element of your preparation work to catch potential problems while they’re still easy to fix.
Start by re-confirming all measurements against the original cabinet specifications. Check wall-to-wall dimensions at multiple heights, since older Waterloo homes often have walls that bow or lean slightly. Verify that diagonal measurements match to confirm the space is square. Measure from floor to ceiling at several points to identify any variations that could affect tall cabinets.
Test structural integrity by pressing firmly against repaired wall sections. They should feel solid with no flex or give. Check that all patching compound is fully cured and sanded smooth. Run your hand along walls where cabinets will mount to detect any bumps or depressions that need additional attention.
Use this final inspection checklist to confirm readiness:
- All measurements documented and match cabinet specifications within 3mm tolerance
- Walls are plumb, square, and free of damage or soft spots
- Floor is level within acceptable range, with any shimming requirements noted
- All required electrical outlets are installed, tested, and positioned correctly
- Plumbing supply and drain lines are capped and positioned as specified
- Wall surfaces are primed, dry, and ready for cabinet mounting
- Layout lines and stud locations are clearly marked and visible
- Work area is clean, debris-free, and provides clear access for installers and materials
Document your verification with photos showing completed preparation work, marked layout lines, and utility locations. Share this documentation with the installation team along with notes about any site-specific considerations they should know. Point out where you’ve made repairs, where walls aren’t perfectly plumb, or where clearances are tight. Clear communication about actual conditions prevents surprises and helps installers plan their approach effectively.
Common Preparation Challenges in Waterloo Homes
Waterloo’s diverse housing stock presents unique challenges that contractors should anticipate during cabinet preparation work. Homes built between the 1950s and 1980s often feature plaster walls that crack more easily than modern drywall during cabinet removal, requiring careful demolition techniques and more extensive patching. Foundation settling is common in older properties, particularly in neighborhoods near the original city core, resulting in floors that slope noticeably over a kitchen’s width. Use self-leveling compound for variations exceeding 1/4 inch over 10 feet, or shim cabinets during installation to maintain proper alignment.
Electrical systems in pre-1970s homes frequently lack sufficient outlets for modern kitchens and may use outdated wiring that doesn’t meet current foundation materials standards and code requirements. Budget time for a licensed electrician to upgrade circuits and add GFCI-protected outlets near sinks. Plumbing configurations typical to the region include galvanized steel supply lines prone to corrosion and cast iron drains that may need replacement. Inspect connections thoroughly during cabinet removal, as deteriorated pipes often fail when disturbed.
Knob-and-tube wiring still exists in some heritage properties, requiring complete removal before proceeding with cabinet work. Asbestos-containing materials appear in homes built before 1990, particularly in flooring adhesives and drywall compound. When you encounter suspected asbestos, halt work and arrange professional testing before continuing preparation.
Coordinating with Installation Teams and Next Steps
Once your preparation work passes inspection, clear communication with the cabinet installation team ensures a smooth transition to the final phase.
Schedule a pre-installation walkthrough with the lead installer at least 48 hours before the planned start date. Walk them through the prepared space, point out where utilities have been relocated, and discuss any site-specific considerations they should know. This prevents surprises on installation day and allows them to adjust their approach if needed.
Document the current state with photos showing completed repairs, marked layout lines, and utility locations. Share these images with the installation team along with updated measurements and any changes from the original plans. This visual record protects both parties and serves as a reference during installation.
Confirm site access details including parking for installation vehicles, entry points for cabinet delivery, and protection requirements for finished areas along transport routes. In Waterloo’s residential neighbourhoods, coordinate with homeowners about noise restrictions and work hours, particularly in attached housing where neighbours may be affected.
Maintain open communication channels throughout installation day. Designate a project contact who can quickly address questions about wall blocking locations, structural concerns, or unexpected conditions that arise. Being responsive during this critical phase demonstrates professionalism and keeps the project moving forward without costly delays.
Frequently Asked Questions
How long does preparation work typically take before cabinet installation?
Most preparation work for fitted-cabinet installation takes two to five days, depending on the scope of demolition, repairs, and utility modifications required. Older Waterloo homes with more extensive repairs or outdated systems may need up to a week for proper preparation.
Do I need permits for cabinet preparation work in Waterloo?
You typically need permits for electrical, plumbing, or structural modifications during preparation, even if the cabinet installation itself does not require one. Contact the City of Waterloo Building Division before starting work that involves relocating utilities or making structural changes to walls or floors.
Should homeowners vacate during the preparation phase?
Homeowners do not usually need to leave for the entire preparation period, but they should plan to avoid the work area during demolition and when utilities are disconnected. If asbestos or lead paint remediation is required in older homes, temporary relocation may be necessary for safety.
What should I do if we discover unexpected damage during demolition?
Stop work immediately and document the damage with photos. Contact the homeowner and assess whether structural repairs, mold remediation, or additional utility work is needed before proceeding. Adjust the timeline and budget accordingly, and obtain necessary approvals before continuing.
How long should I rent equipment for preparation work?
Plan to rent equipment for the full estimated preparation timeline plus an extra day or two as buffer for unexpected issues. Most contractors rent demolition tools and ladder safety equipment for three to seven days to cover the typical preparation window without rush fees.
Can preparation work be done in phases to minimize disruption?
Yes, you can schedule demolition, repairs, and utility work in distinct phases, though this may extend the overall timeline. Breaking work into phases helps homeowners maintain some kitchen functionality and allows for better coordination with licensed tradespeople for electrical and plumbing modifications.
Proper preparation planning prevents most installation delays. Clear communication with homeowners about the timeline, potential discoveries, and safety requirements keeps projects on track and maintains professional relationships. When unexpected challenges arise, addressing them thoroughly during preparation ensures the cabinet installation phase proceeds smoothly without interruptions or compromised quality.
Thorough preparation sets the foundation for a successful fitted-cabinet installation in any Waterloo home. By completing these seven steps systematically, contractors eliminate common installation delays, prevent costly rework, and deliver results that meet professional standards. Taking time to properly assess the space, address structural issues, coordinate utilities, and verify readiness before installers arrive transforms a potentially complex project into a smooth, efficient process.
Remember that comprehensive preparation protects both project timelines and customer satisfaction. When questions arise during preparation work, technical support and safety resources are available to help contractors navigate challenges specific to Waterloo’s diverse housing stock. Investing effort in proper groundwork today ensures cabinet installations proceed on schedule and deliver the quality results your clients expect.